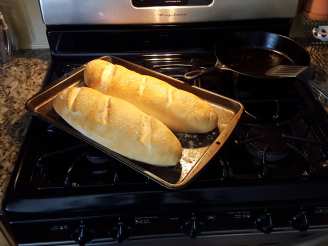
French Baguette

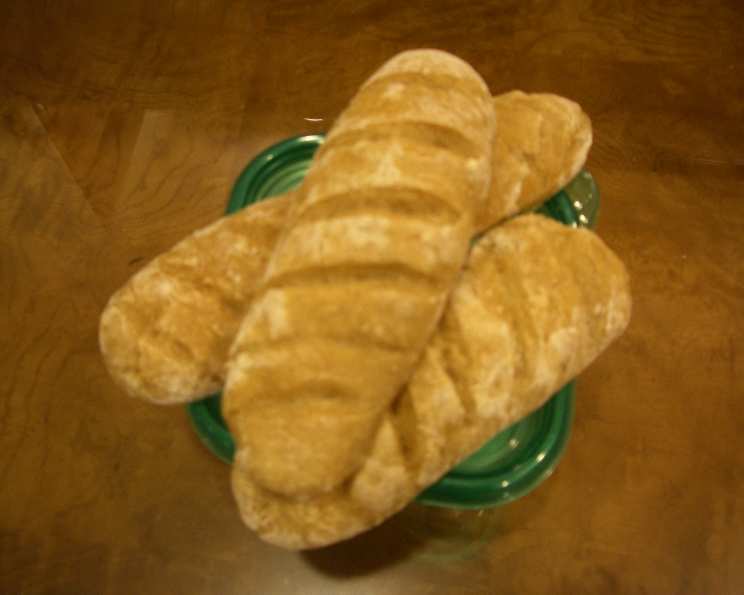
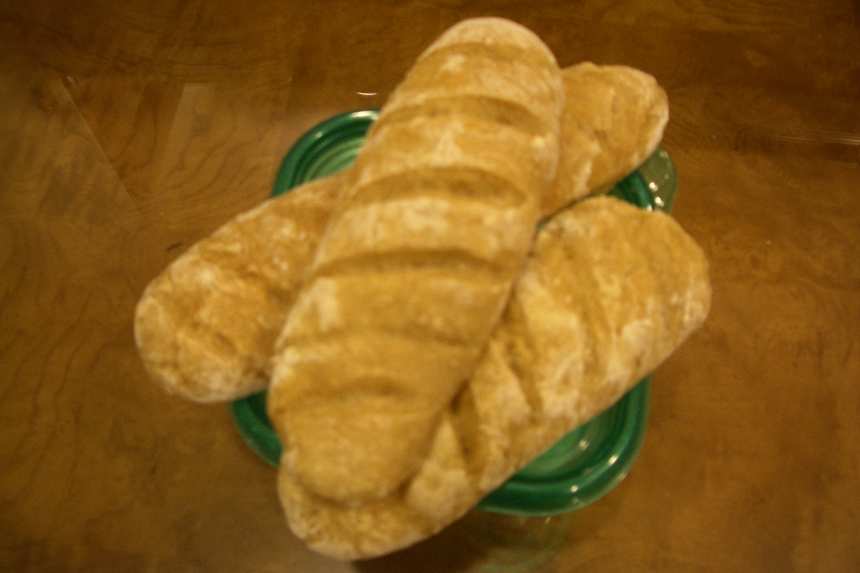
photo by Heystopthatnow


- Ready In:
- 12hrs 30mins
- Ingredients:
- 5
- Yields:
-
2 loaves
ingredients
-
Starter Dough
- 1 1⁄2 teaspoons active dry yeast
- 2 cups lukewarm water (100-110 degrees)
- 2 cups unbleached all-purpose flour
-
Bread
- 2 cups unbleached all-purpose flour
- 1 1⁄2 teaspoons salt
directions
- Other equipment: unbleached all-purpose flour for kneading, sesame seeds (optional), cornmeal, tray of hot water, razor blade, sheetpan, parchment and Dough scraper.
- Starter Dough: In a small bowl, mix the yeast in the lukewarm water (do the baby's bottle test on your wrist) and make sure that it bubbles (about 10 minutes).
- In a bowl large enough for the starter dough to triple, transfer the yeast-water mixture, add the flour a half a cup at a time mixing it in well with a wooden spoon.
- When the ingredients have been thoroughly combined, the Starter Dough will be quite soupy.
- Let the Starter Dough rise, covered, in a no-draught spot on the counter (at room temperature) for 7 to 10 hours.
- Bread: To make the dough, add 1/2 cup of flour to the Starter Dough.
- Stir with a wooden spoon.
- Continue to add all but 1/2 cup of the remaining flour, 1/2 cup at a time, stirring all the time.
- (Note: To make a more rustic bread, use 1/2 c whole wheat flour and 1 1/2 c white flour).
- You don't have to add all the flour.
- You know it's enough when the dough comes away from the side of the bowl.
- It will still be quite sticky.
- Dust your board or counter with some of the last 1/2 c flour and then scrape the dough out of the bowl.
- Sprinkle salt over top.
- Use the extra flour to help you handle the wet dough.
- Using a dough scraper when the dough sticks to the surface, knead the dough for 10 to 15 minutes until it is smooth and silky (it should feel like your ear lobe when done).
- Scrape away any dough that is on the board.
- As you knead, add flour a very little at a time to stop it from sticking.
- The dough will still be quite loose.
- Put the dough in a lightly floured bowl.
- Cover with a damp towel and let rise in a no-draught place for 1 to 1 1/2 hours.
- When the dough has doubled, deflate the dough by pushing down on it with your fist and turn it out onto the board.
- Divide it in two equal pieces.
- Sprinkle or Sift a fine coating of flour on the work surface.
- Place one ball of dough on the surface and gently pat it down to an even thickness of 1 inch.
- Do not attempt to deflate every air bubble.
- Using the heels and palms of your hands, flatten the dough into a crude rectangle measuring about 1 inch thick.
- Fold the long side farthest from you a little over 2/3 of the way toward you.
- Using the heel of your hand, gently press the folded edge to seal the dough.
- Pick up the dough and turn it 180 degrees.
- Fold over the other long edge of the dough about 2/3 of the way, and seal with the palm of your hand.
- To make a compact cylinder easy to roll into a baguette shape, use both hands to fold the log in half lengthwise.
- This time, as you fold, press your thumbs gently inside the fold to create tension on the surface of the log.
- Using your fingertips, press the edges together to seal the dough into a taut cylinder.
- This will produce a visible seam running the length of the dough.
- To roll the dough into a baguette shape, place both hands on the center of the log with your fingers spread apart.
- Using light uniform pressure, gently roll the dough back and forth into a long snake.
- Taking care not to stretch the dough, move your hands from the center of the dough to the ends as the loaf begins to lengthen to about 14- 16 inches.
- If the dough resists rolling, let it rest for 5 minutes before continuing.
- Put the baguette seam side down on a baking pan that has cornmeal (or parchment) sprinkled on the bottom of the pan.
- Optional: Wet your hands well and rub the dough.
- Sprinkle sesame seeds over each baguette.
- Repeat forming process with the other piece of dough.
- Cover sheetpan with plastic wrap then a damp towel and let rise again to almost double (about 45 minutes).
- Thirty minutes before you are going to bake, turn oven to 500F and Put water into a broiling pan and place it on the bottom rack of the oven.
- Slash the top of the baguettes with a very sharp knife or razor blade horizontally across the loaf at a slight angle- make cuts at 2-3- inch intervals.
- Spray the baguettes liberally with water.
- Put bread in oven and immediately turn the oven down to 450F.
- Bake the bread on the second lowest rack for 30 minutes or until it is hollow sounding on the bottom.
- The bread will be done when the internal temperature reaches 200 degrees.
- Turn off the oven.
- leave the finished bread in the oven and leave with the door ajar for 5 or 10 minutes.
- Remove to cool on cooling racks.
- Wait until the bread is cool before cutting it.
Questions & Replies

Got a question?
Share it with the community!
Reviews
-
 What a great teacher you are Mean Chef! Your instructions are clear enough for the yeast challenged (me), and the final product is wonderfully crispy crunchy on the outside, and tender and light inside. I have already made the recipe twice, and I plan on making it at least once a week. Thank you!!
 -
 Mean, thanks so much for this excellent, detailed recipe. The baguettes are awesome, but I am even happier to have the confidence to tackle recipes like this, knowing that you will be around to help. Sincere thanks!
 -
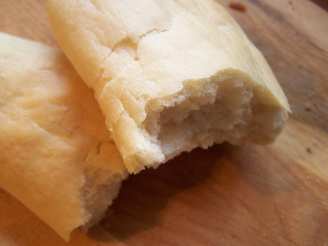
 This deserves more than 5 stars. The most wonderful tasting French bread I've ever eaten, and low fat, low-calorie. It has a Crisp yet chewy outside crust with a tender inside that has a nice little chew and good texture. This is definitely a winner even though I missed your class! If you follow the directions exactly, you can't fail to have wonderful bread!
 -
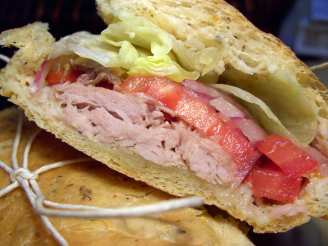
Awesome!!!! I made them to use for meatball subs. When I took them out of the oven, I couldn't wait for them to cool to try so cut off a little piece. It was so good. I will definitely be making these again and again. Thanks for such a great recipe.
-
 Great Recipe!
see 3 more reviews
RECIPE SUBMITTED BY

Loves2Teach
clarksville, tn
I am a teacher, and have been married to my high school sweetheart for almost 9 years. I have a niece who is 7, and a nephew who is 1. Also, I have 2 sweet kitties. Sinatra is a bit on the plump side, and Audrey is a petite dainty thing. They both are almost mirror images of each other.
<a href="http://photobucket.com/" target="_blank"><img src="http://img.photobucket.com/albums/v202/airbornearmywife/joshnatras2.jpg" border="0" alt="Photobucket - Video and Image Hosting"></a>
<embed type="application/x-shockwave-flash" wmode="transparent" src="http://wmg.photobucket.com/pbwidget.swf?pbwurl=http://wmg.photobucket.com/albums/v202/airbornearmywife/1159026847.pbw" height="120" width="400"></embed>
<a href="http://www.amazingcounter.com"><img border="0" src="http://c8.amazingcounters.com/counter.php?i=1680027&c=5040394" alt="Web Counter"/></a>
<img src="http://i42.photobucket.com/albums/e347/Saturn6666/KiwiDutch/3chefstag1.jpg"> <img src="http://i23.photobucket.com/albums/b399/susied214/permanent%20collection/PAC08Main.jpg" border="0" alt="Photobucket"><img src="http://i23.photobucket.com/albums/b399/susied214/permanent%20collection/adoptedspring08.jpg" border="0" alt="Photobucket">